---- DATABASE ERROR ----Quick And Dirty: Making A Lamp With JPatch 0.3
by Mike Kost
Introduction
JPatch 0.3 is a quick and easy
spline-based modeler that exports to both Povray and RenderMan. It's written in
Java, lightweight and has an easy-to-use material editor. This Quick
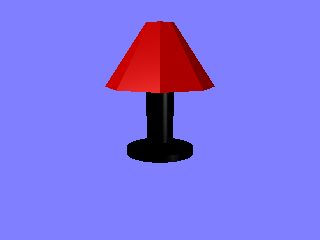
and Dirty tutorial shows how to quickly leap into JPatch 0.3 by making
and rendering a lamp in Povray.
Quick Reading
Here's some reading material as reference and additional information.
Getting and Running JPatch
JPatch can be downloaded from Sourceforge here. When
it's unzipped or untarred, the jpatch.jar is in the newly created
subdirectory.
To execute JPatch, you need a Java Runtime Environment version 1.4 or
later. If you're lacking this, Sun Microsystems will be happy to provide it.
Once you have both available, start JPatch with 'java -jar jpatch.jar'
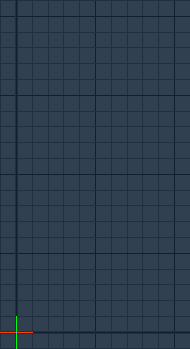
First Look
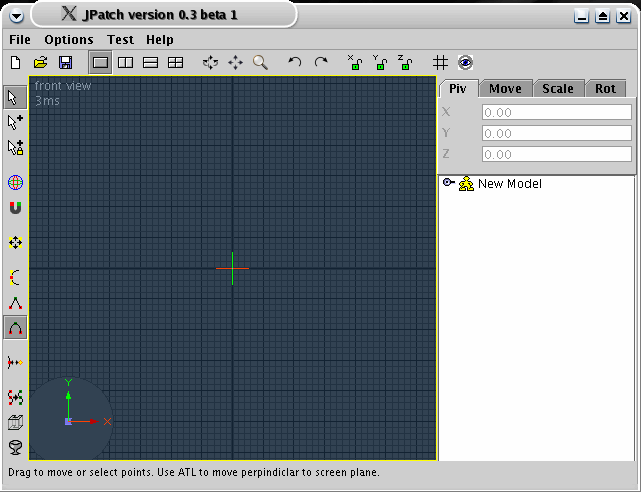
On startup, you're presented with a basic window. The tool bar across
the left from top to bottom handles model manipulation. The tool bar
across the top from left to right is used to change views of the model.
For this Quick and Dirty, we'll mostly be interested in the tool bar
icons below.
Toolbar Icons
|
Function
|

|
Add point
|

|
Lathe
|

|
Snap to grid
|
Quick Configurations
When working with JPatch, there's a few things I like to do in
preparation for working on a project:
- I enable Snap to Grid by clicking on the "Snap to grid" icon.
This prevents points from getting off grid and getting sloppy before I
intend them to.
- I adjust my grid spacing value down to something more like "0.1".
This is done through the menu selection Options->Set Grid Spacing. I
like to think of my objects in units like feet or meters so using minor
grid steps of 1 foot or 1 meter becomes annoying. You can zoom by
placing your mouse cursor over the grid area and using the mouse scroll
wheel to zoom in (up) and zoom out (down).
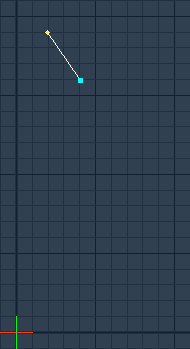
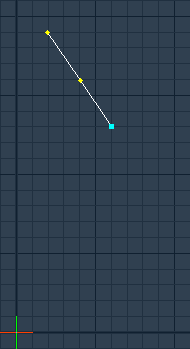
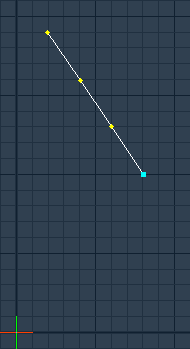
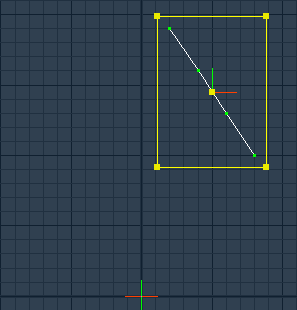
Putting Down The First Line Segments
To begin, we need to put down 3 points. To place the first line
segment: click the "Add point" icon, left-click and hold where you wish
the line segment to begin, and drag the mouse and release to where
you'd like the line segment to end. If you've enabled snapping to grid,
the cursor will want to head toward a grid point. For the purposes of
this tutorial, the line segment should be close to the Y-axis (noted in
the lower left corner by the vertical green line). After the first line
segment is added, add 2 more with the new line segments picking up
where the old one ended.
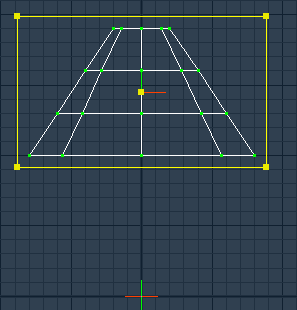
Lampshade Lathe
The next step is to perform a lathe operation on the line segments we
just added. To do this, select the 3 line segments by left-clicking and
dragging to create a box around the 3 line segments. After the line
segments are selected, click the "Lathe" icon. Select the default
number in the popup dialog box. The lathe operation rotates the
structure we just made around the Y-axis and is very similar in
principle to the Povray lathe object. To get an idea of how the object
has been transformed, right click on the grid area and select
views->Top view. If you need a better view of our new lamp shade,
middle-click and hold to move the grid around. Repeat the process
selecting views->Front view when to get back to where we started.
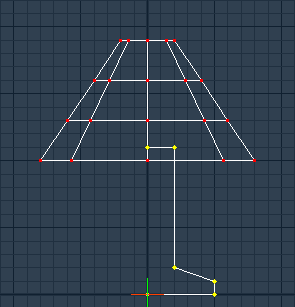
Base Lathe
The next step is to create the lamp base. Using the Add point icon,
construct a base. Because the lamp shade is in the way, it is much more
difficult to select all the points for a lathe operation. Instead,
click on the points in the base individually while holding down the
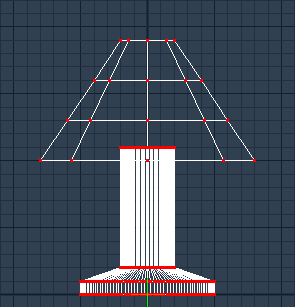
CTRL key. After selecting all the points in the lamp base, click the
"Lathe" icon. When prompted, enter "128" for the number of segments.
The segments determine the number of steps that will be used to create
the resulting lathe structure. For the lamp shade, we used the default,
8 segments. As you notice after the lathe is finished, the base has a
much more detailed modeling because more segments were used.
Generating Patches
After everything is done, press F5. This causes JPatch to compute all
the various patches that make up our new lamp. To see the result,
right-click on the grid area and select show->patches. You'll notice
that the lamp fills in. Every time you make additions, deletions, or
changes to the model, you need to recompute the patches.
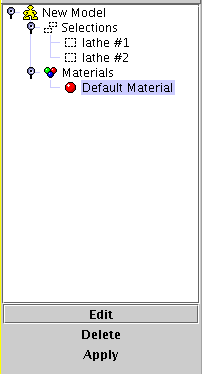
Materials
After all that work, we still only have a gray lamp. To change colors,
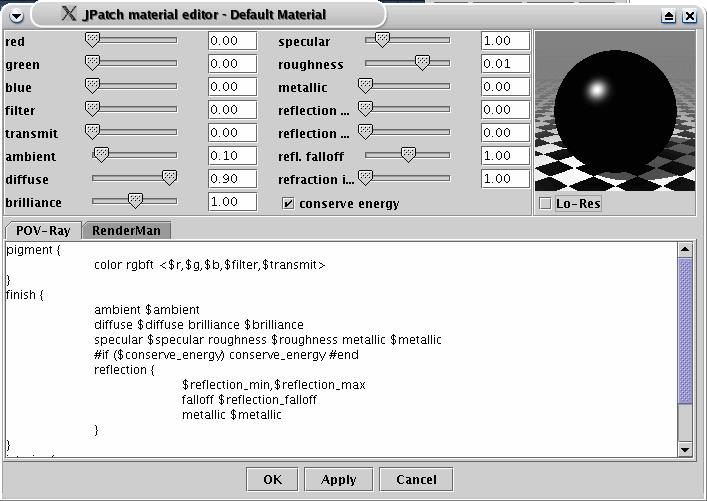
we need to do some material editing. Under the Materials tree, select
the Default Material and click edit. This will bring up the JPatch
material editor. Here you can play with various color and finish
combinations to find a material that works for your needs. In this
case, I want a black lamp base and have altered red, green, and blue
accordingly. Clicking OK closes the material editor and saves the
changes.
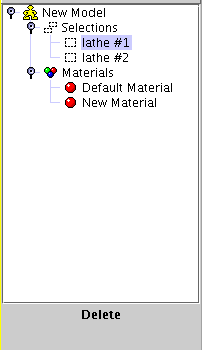
Since I want the lamp shade to be a different color, I select the
Materials entry in the tree and click "New Material". This creates a
new material called New Material. I want a red lampshade and I alter
the New Material to make it red using the procedure mentioned above. To
apply the New Material to my lampshade, click on the "lathe #1" tree
element. This selects the lampshade. Now click on the New Material tree
element and click Apply. The lampshade is now red.
Rendering
To render our new lamp, choose File->Export. When you choose a file
name, this object will export as a Povray include file. I exported it
as "object.inc". To give
povray a source, I used the default Povray source included with JPatch,
altered to read in my lamp and move the camera slightly.
camera
{
angle 50
location
<0,15,-50>
look_at
<0,5,0>
}
background {
color rgb
<0.5,0.5,1.0>
}
light_source {
<-1000,1000,-1000> color rgb 0.66 parallel }
light_source {
<1000,0,-1000> color rgb 0.33 parallel }
light_source {
<0,1000,1000> color rgb 1.0 parallel }
#include "object.inc"
You can get my example files here: example_scene.pov,
object.inc.zip
The final rendering was done by 'povray
+P +W320 +H240 example_scene.pov'.
Last edited: 06/28/04
Copyright (C) 2004 Mike Kost