---- DATABASE ERROR ----

Quick And Dirty: Signatures Part 2 - The GIMP

by Mike Kost

Introduction

Part 1 of the signature series introduced ImageMagick and adding signatures. For some, though, the command-line is not the most efficient way to work. Image editing tools are equally capable of adding signatures to Povray renderings. The GIMP is a freely available image editing tool that can be used to quickly sign the latest rendered artwork. This second Quick and Dirty tutorial in the signature series will demonstrate how to add a signature to renderings using GIMP.

Quick Reading

If you're not familiar with the GIMP, take a stop at the links below:

The GIMP

GIMP (Gnu Image Manipulation Program) is a freely available (and free) program for editing and manipulating digital images. It is similar to Adobe Photoshop and is handy to have around whenever an image needs a crop or touch-up. GIMP comes by default with just about every Linux distribution, and is downloadable for Windows.

This tutorial used GIMP 2.2.4 in Mandriva Linux 2005 LE.

Starting-Up

First things first - start up GIMP. From Windows, it should be off of the Start Menu->Programs->GIMP->GIMP 2. For Linux, type 'gimp &' from the command-line or Menu->Multimedia->Graphics (this is highly distribution dependent - your milage my vary). From here, the main window pops up.
Gimp Main Window
Two tools will be useful for adding signatures. The icons and descriptions are below.
Text Tool Icon
Add text to the image: this will be used to add the signature text
Move Tool Icon
Move layers and selections: this will be used to position the signature on the image
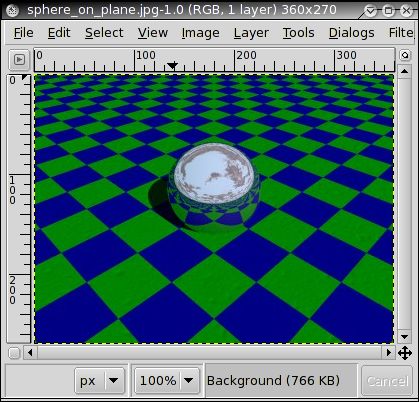
Using the previously rendered sphere on checkered plane (source here), open the rendered output in the GIMP. Do this by File->Open or Ctrl-O and select the rendered output image. GIMP should pop up a window with the image in it like the one shown below.
Our scene

Adding Text

Click on the 'Add text to the image' tool in the main window. It'll be selected when the icon is highlight. The Tool Options dialog box should look like the one below, or be docked underneith the main window. If it can't be found, hit Ctrl-Shift-T to call it up.
Add Text Tool Options
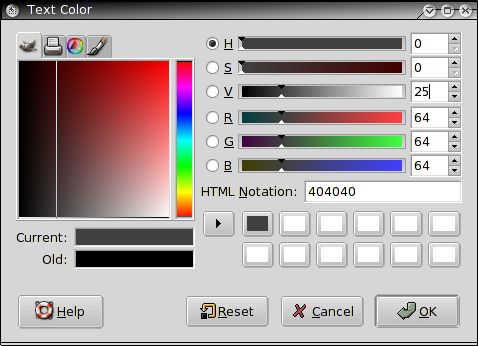
From here, select the signature font. Do this by clicking on the box to the right of 'Font:' in the Tool options. This tutorial uses the 'Embargo' font. After finding a satisfactory font, the color needs to be adjusted. Click on the box to the right of 'Color:'. This will pop-up the Text Color window.
Change Color Dialog Box
Select a shade of gray[1]. 25% - 33% gray (meaning, it's 25% - 33% of white) works well. This can be done by manipulating the 'V' (value) slider to 25, or setting the 'R' (red), 'G' (green), and 'B' (blue) sliders to 64. Note that the red, green, and blue sliders have a range of 0 - 255, so 25% is about 64. After getting the color set, click 'OK'.

Click on the previously loaded image (click on the left side). A GIMP Text Editor window should open and prompt for some text. Enter the signature text in this window.
Text Entry Dialog
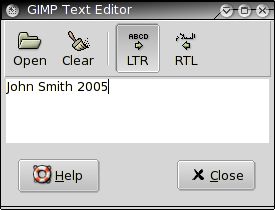
As the signature text is entered, it should appear over the image as shown below. If the text position needs some adjusting, use the 'Move layers and selections' tool to relocate the text. Once the tool is activated, left-click on the text and drag it to a preferred location. Be careful to click on one of the letters and not the background. Its easy to accidently click the rendered image and rearrange it instead. If anything goes awry, Ctrl-Z is the undo command. 
Text Placed On Main Window

Font Effects

From here, open up the Layers window by hitting Ctrl-L. Select the layer with the signature text by left-clicking, and change the mode to Addition. This will cause the original image to lighten by 25% (the gray color used in the font).
Image Layers Dialog
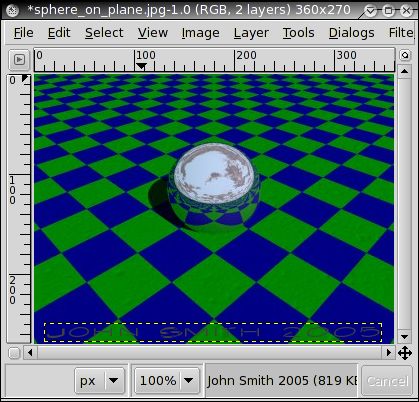
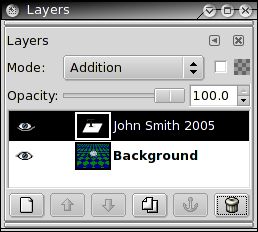
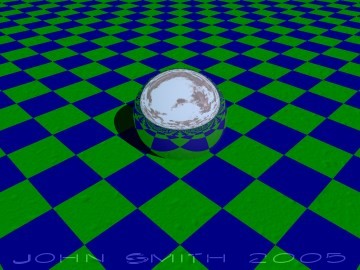
There are many other effects available, including Subtraction, Multiply, and Divide. Spend a little time trying others to see how it changes the signature. After the signature is complete, it can be saved via File->Save, File->Save As, or File->Save Copy from the image window. Behold, the signed rendering:
Final Signed Image

Concluding Remarks

Just as with the last signature tutorial, this was more an exercise in using GIMP instead of Povray. It's fun though, and getting to know GIMP is handy for working with post-rendered images. Happy signing!

Additional Reading

A few more GIMP tutorials for learning the ropes.

Notes and Disclaimers.

[1] - For the final signed image, I find that a gray value less intrusive than other choices. This is a personal preference. Experiment with different color combinations to see how they interact with the final rendered image.

Published: 09/01/05
Last edited: 09/01/05

Copyright (C) 2005 Mike Kost