sky_sphere {Each sky_sphere contains a pigment. The pigment is almost always a color_map of some kind. The real magic in creating a great sky is generating the color map.
pigment {
<function>
color_map {
[0.0 <color>]
...
[1.0 <color>]
}
}
}
Two preferrable alternatives are shown below, each with "better" behavior
We prefer using the second alternative, and all the sky spheres in this article do so.
function { abs(y) }
function { max(min(y,1),0) }
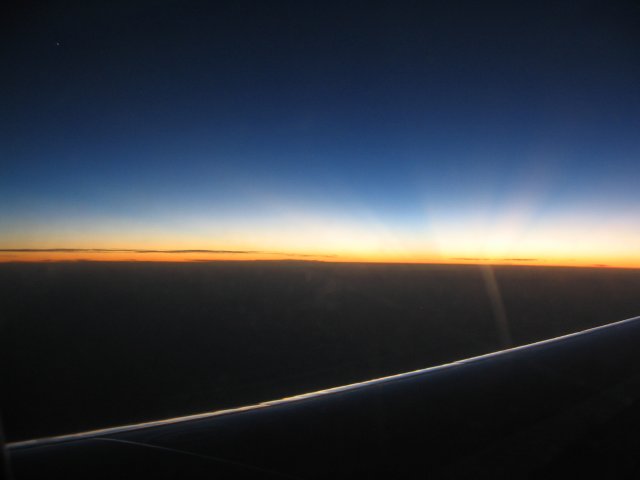
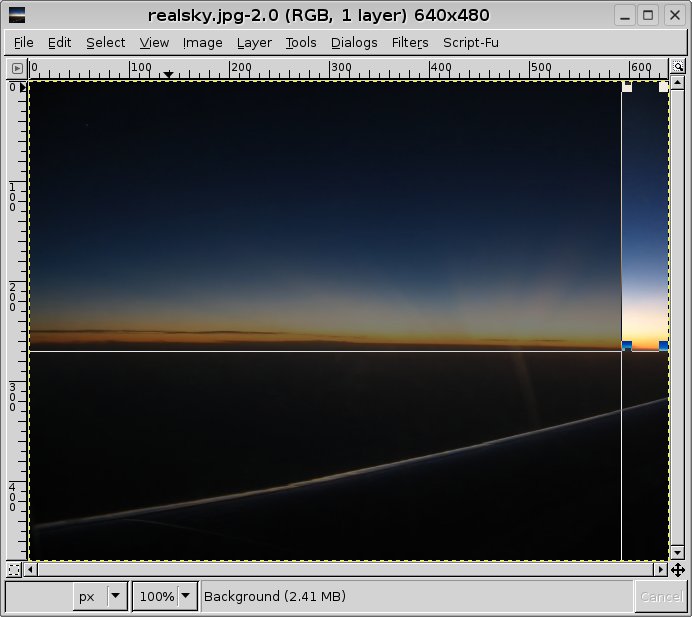
To get the image down to something workable, open it up in the Gimp and crop it [1] to a workable section of sky.
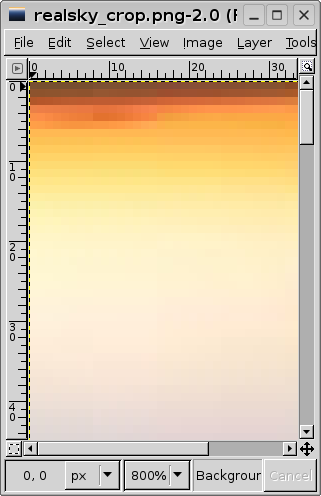
Having cropped the image, flip it 180 degrees by using Image->Transform->Flip Vertically. This gives the image below.
Althought it seems goofy, it's easier to work with the sky upside-down. Just believe for the moment - it'll be explained in a minute. Having gotten this far, I suggest saving off the small section of sky so that it's easy to refer to.
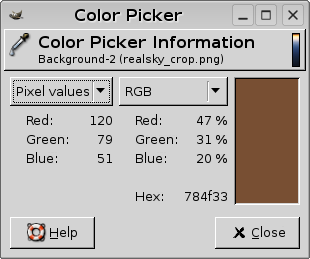
This is where the tedious work begins. To get a good sky_sphere, we'll slowly iterate through the section of sky and pick colors to place in the color_map. Every pixel has an X and Y value. Y increases as you move down the image and X increases as you move to the right of the image. This is why the image is flipped - Povray thinks increasing Y is up while Gimp thinks increasing Y is down. By inverting the image, we keep the ground level (Y = 0) low and the sky (Y = a lot) high.
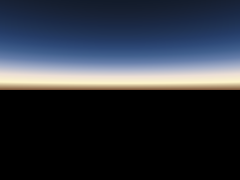
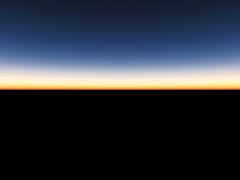
[ 0/269 color rgb <120/255, 79/255, 51/255>]Taking this and rendering it in Povray gives the image below
[ 20/269 color rgb <255/255,246/255,203/255>]
[ 40/269 color rgb <236/255,223/255,214/255>]
[ 60/269 color rgb <166/255,176/255,201/255>]
[ 80/269 color rgb <103/255,127/255,171/255>]
[100/269 color rgb < 66/255, 97/255,143/255>]
[120/269 color rgb < 47/255, 75/255,122/255>]
[140/269 color rgb < 37/255, 60/255,102/255>]
[160/269 color rgb < 32/255, 51/255, 84/255>]
[180/269 color rgb < 27/255, 42/255, 71/255>]
[200/269 color rgb < 25/255, 36/255, 58/255>]
[220/269 color rgb < 22/255, 31/255, 48/255>]
[240/269 color rgb < 18/255, 27/255, 42/255>]
[260/269 color rgb < 15/255, 21/255, 33/255>]
[269/269 color rgb < 15/255, 21/255, 33/255>]
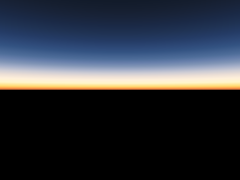
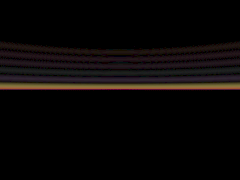
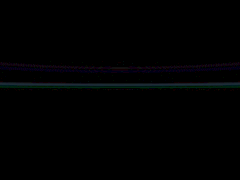
[ 0/269 color rgb <120/255, 79/255, 51/255>]Rendering again, we get this second and better scene. The image on the right shows the difference between the first and second renderings [3].
[ 1/269 color rgb <141/255, 83/255, 46/255>] // New
[ 2/269 color rgb <177/255, 86/255, 41/255>] // New
[ 3/269 color rgb <235/255,128/255, 72/255>] // New
[ 5/269 color rgb <255/255,159/255, 72/255>] // New
[ 10/269 color rgb <255/255,218/255,112/255>] // New
[ 20/269 color rgb <255/255,246/255,203/255>]
[ 30/269 color rgb <255/255,240/255,219/255>] // New
[ 40/269 color rgb <236/255,223/255,214/255>]
[ 50/269 color rgb <205/255,204/255,212/255>] // New
[ 60/269 color rgb <166/255,176/255,201/255>]
[ 70/269 color rgb <129/255,149/255,182/255>] // New
[ 80/269 color rgb <103/255,127/255,171/255>]
[ 90/269 color rgb < 79/255,110/255,154/255>] // New
[100/269 color rgb < 66/255, 97/255,143/255>]
[110/269 color rgb < 52/255, 84/255,131/255>] // New
[120/269 color rgb < 47/255, 75/255,122/255>]
[140/269 color rgb < 37/255, 60/255,102/255>]
[160/269 color rgb < 32/255, 51/255, 84/255>]
[180/269 color rgb < 27/255, 42/255, 71/255>]
[200/269 color rgb < 25/255, 36/255, 58/255>]
[220/269 color rgb < 22/255, 31/255, 48/255>]
[240/269 color rgb < 18/255, 27/255, 42/255>]
[260/269 color rgb < 15/255, 21/255, 33/255>]
[269/269 color rgb < 15/255, 21/255, 33/255>]
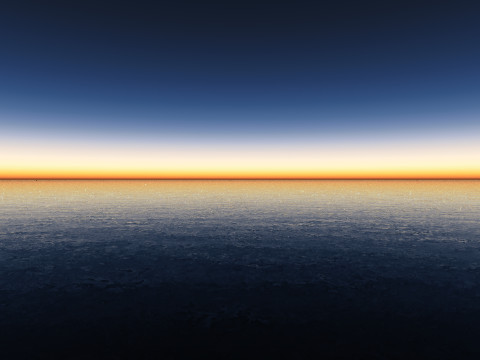
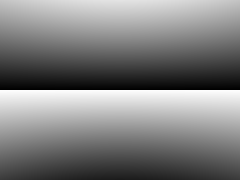
[ 0/269 color rgb <120/255, 79/255, 51/255>]The result is rendered one more time and differenced against the second pass color map. Much better.
[ 1/269 color rgb <141/255, 83/255, 46/255>]
[ 2/269 color rgb <177/255, 86/255, 41/255>]
[ 3/269 color rgb <235/255,128/255, 72/255>]
[ 5/269 color rgb <255/255,159/255, 72/255>]
[ 8/269 color rgb <255/255,203/255, 94/255>] // New
[ 10/269 color rgb <255/255,218/255,112/255>]
[ 13/269 color rgb <255/255,233/255,148/255>] // New
[ 15/269 color rgb <251/255,241/255,172/255>] // New
[ 20/269 color rgb <255/255,246/255,203/255>]
[ 30/269 color rgb <255/255,240/255,219/255>]
[ 40/269 color rgb <236/255,223/255,214/255>]
[ 50/269 color rgb <205/255,204/255,212/255>]
[ 55/269 color rgb <185/255,190/255,209/255>] // New
[ 60/269 color rgb <166/255,176/255,201/255>]
[ 65/269 color rgb <149/255,163/255,190/255>] // New
[ 70/269 color rgb <129/255,149/255,182/255>]
[ 80/269 color rgb <103/255,127/255,171/255>]
[ 90/269 color rgb < 79/255,110/255,154/255>]
[100/269 color rgb < 66/255, 97/255,143/255>]
[110/269 color rgb < 52/255, 84/255,131/255>]
[120/269 color rgb < 47/255, 75/255,122/255>]
[140/269 color rgb < 37/255, 60/255,102/255>]
[160/269 color rgb < 32/255, 51/255, 84/255>]
[180/269 color rgb < 27/255, 42/255, 71/255>]
[200/269 color rgb < 25/255, 36/255, 58/255>]
[220/269 color rgb < 22/255, 31/255, 48/255>]
[240/269 color rgb < 18/255, 27/255, 42/255>]
[260/269 color rgb < 15/255, 21/255, 33/255>]
[269/269 color rgb < 15/255, 21/255, 33/255>]